Wednesday, 25 December 2013

Internet Download Manager v6.18 Build 11 + Serial , Patch & Keygen

Internet Download Manager (IDM) adalah aplikasi untuk meningkatkan kelajuan muat turun sehingga 5 kali ganda, resume dan jadual muat turun. Pemulihan kesilapan yang menyeluruh dan keupayaan resume akan memulakan semula muat turun yang rosak atau terganggu kerana kehilangan sambungan, masalah rangkaian, penutupan komputer, atau gangguan kuasa yang tidak diduga. Antara muka pengguna grafik yang mudah membuat IDM mesra pengguna dan mudah untuk digunakan.

Download: 

- Setup + Fix + Serial :


- Patch Only :
- Password (Jika diperlukan) : faiz-tutorial.blogspot.com

Friday, 20 December 2013

Tutorial Menggunakan Fungsi CSS3 - " :Before And :After Pseudo Elements " Pada " Sidebar Title "


Tutorial:

PS: PASTIKAN ANDA BACKUP DAHULU TEMPLATE BLOG ANDA UNTUK LANGKAH KESELAMATAN . Lihat sini >> http://faiz-tutorial.blogspot.com/2013/02/tutorial-backuprestore-template.html

1. Login ke akaun blogger anda.
2. Klik pada Template

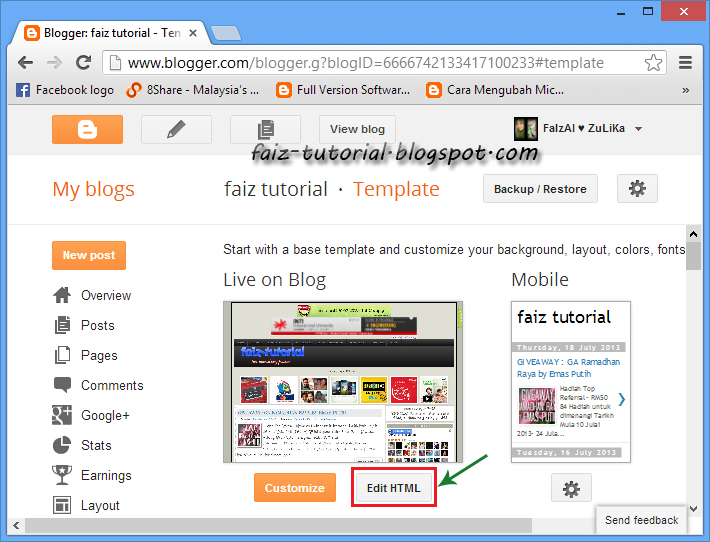
3. Klik Edit HTML

4. Klik pada ruang edit html dan tekan CTRL+F untuk paparkan ruang search

5. Cari (CTRL + F) kod dibawah:
</head>
6. Copy (CTRL+C) dan Paste (CTRL+V) kod dibawah , sebelum kod </head>
<style>
.module h2 {
  background-color: #D5D5D5;
  border-radius: 20px 0 0 20px;
  color: #FFFFFF;
  font-family: Verdana;
  font-size: 14px;
  line-height: 32px;
  margin: 0;
  padding: 0 0 0 20px;
  text-shadow: 2px 1px 1px #222;
}
.module h2 a {
    border-left: 5px solid #ffffff;
    color: #101921;
    float: right;
    font-size: 14px;
    text-decoration: none;
    text-shadow: none;
    padding: 0 10px;
    position: relative;
   -moz-transition: padding 0.1s linear;
   -webkit-transition: padding 0.1s linear;
   -ms-transition: padding 0.1s linear;
   -o-transition: padding 0.1s linear;
}
.module h2 a:hover {
  padding: 0 32px;
}
.module h2 a:before, .module h2 a:after {
    content: "";
    height: 0;
    position: absolute;
    top: 50%;
    width: 0;
}
.module h2 a:before {
    border-bottom: 8px solid transparent;
    border-right: 8px solid #ffffff;
    border-top: 8px solid transparent;
    left: -12px;
    margin-top: -8px;
}
.module h2 a:after {
    border-bottom: 6px solid transparent;
    border-top: 6px solid transparent;
    left: -6px;
    margin-top: -6px;
}
.module.blue h2 a {background-color: #A2D5EC;}
.module.blue h2 a:hover {background-color: #C5F0FF;}
.module.blue h2 a:after {border-right: 6px solid #A2D5EC;}
.module.blue h2 a:hover:after {border-right-color: #C5F0FF;}
.module.green h2 a {background-color: #bada55;}
.module.green h2 a:hover {background: #C7E176;}
.module.green h2 a:after {border-right: 6px solid #bada55;}
.module.green h2 a:hover:after {border-right-color: #C7E176;}
.module.red h2 a {background-color: #F0A5B5;}
.module.red h2 a:hover {background-color: #FFC7D2;}
.module.red h2 a:after {border-right: 6px solid #F0A5B5;}
.module.red h2 a:hover:after {border-right-color: #FFC7D2;}
.module.yellow h2 a {background-color: #FCE98D;}
.module.yellow h2 a:hover {background-color: #FFD700;}
.module.yellow h2 a:after {border-right: 6px solid #FCE98D;}
.module.yellow h2 a:hover:after {border-right-color: #FFD700;}
</style>
    7. Klik Preview template dan jika ok, klik Save Template
    8. Klik Layout --->  Add a Gadget --->  HTML/JavaScript

    9. Copy (CTRL+C) dan Paste (CTRL+V) salah satu kod dibawah pada ruang HTML/JavaScript

    a) Biru :
     <div class="module blue">
    <h2>Title in <a href="Link/URL">TAJUK SIDEBAR</a></h2>
    </div>
    b) Kuning :
     <div class="module yellow">
    <h2>Title in <a href="Link/URL">TAJUK SIDEBAR</a></h2>
    </div>
    c) Hijau :
     <div class="module green">
    <h2>Title in <a href="Link/URL">TAJUK SIDEBAR</a></h2>
    </div>
    d) Merah :
     <div class="module red">
    <h2>Title in <a href="Link/URL">TAJUK SIDEBAR</a></h2>
    </div>
    Keterangan:
    • Gantikan " Title in " dan " TAJUK SIDEBAR " dengan teks anda .
    • Gantikan " Link/URL " dengan link anda.

    9. Klik Save dan lihat hasilnya :)

    Wednesday, 18 December 2013

    Tutorial Efek CSS3 "Rounded Corners" Dan "Shadows" Pada Imej Di Entri Blogger


    PS: PASTIKAN ANDA BACKUP DAHULU TEMPLATE BLOG ANDA UNTUK LANGKAH KESELAMATAN . Lihat sini >> http://faiz-tutorial.blogspot.com/2013/02/tutorial-backuprestore-template.html

    1. Login ke akaun blogger anda.
    2. Klik pada Template

    3. Klik Edit HTML

    4. Klik pada ruang edit html dan tekan CTRL+F untuk paparkan ruang search

    5. Cari (CTRL + F) kod dibawah:
    ]]></b:skin>
    6. Copy (CTRL+C) dan Paste (CTRL+V) salah satu code CSS dibawah sebelum kod ]]></b:skin> .

    a) Efek 1 :

    .post-body img {border:0;
    padding:0;
    -moz-transition: all 1s;
    -webkit-transition: all 1s;
    -o-transition: all 1s;
    }
    .post-body img:hover {box-shadow: 0px 0px 15px #000; /* Shadow */
    border-radius: 50%; /* Rounded border */
    -moz-transition: all 1s;
    -webkit-transition: all 1s;
    -o-transition: all 1s;
    cursor:pointer;
    }
    b) Efek 2 :

     .post-body img {
    background:#FFF; /* background color around the image */
    padding:15px; /* space between border and image */
    -moz-transition: all 1s;
    -webkit-transition: all 1s;
    -o-transition: all 1s;
    }
    .post-body img:hover {
    box-shadow: 0px 0px 15px #000; /* Shadow */
    border-radius: 0% 50%; /* Rounded border */
    -moz-transition: all 1s;
    -webkit-transition: all 1s;
    -o-transition: all 1s;
    cursor:pointer;
    }
      c) Efek 3 :

       .post-body img {
      background:#FFF; /* the background color around the image */
      padding:15px; /* The Space Between Border and Image */
      border-radius: 50% 0; /* Rounded border */
      box-shadow: 0px 0px 15px #000; /* Shadow */
      -moz-transition: all 1s;
      -webkit-transition: all 1s;
      -o-transition: all 1s;
      }
      .post-body img:hover {
      border-radius:0; /* This removes the border roundness (value 0) */
      -moz-transition: all 1s;
      -webkit-transition: all 1s;
      -o-transition: all 1s;
      cursor:pointer;
      }
      d) Efek 4 :

       .post-body img {
      box-shadow: 0px 0px 15px #000; /* Shadow */
      border-radius: 50%; /* Rounded border */
      border:0;
      padding:0;
      -moz-transition: all 1s;
      -webkit-transition: all 1s;
      -o-transition: all 1s;
      }
      .post-body img:hover {
      box-shadow: 0; /* With this we remove the shadow (value 0) */
      border-radius: 0; /* This removes the border roundness (value 0) */
      -moz-transition: all 1s;
      -webkit-transition: all 1s;
      -o-transition: all 1s;
      cursor:pointer;
      }
      e) Efek 5 :

       .post-body img {
      border-radius: 45% / 20%; /* Rounded border */
      box-shadow: 0px 0px 15px #000; /* Shadow */
      padding:0;
      -moz-transition: all 1s;
      -webkit-transition: all 1s;
      -o-transition: all 1s;
      }
      .post-body img:hover {
      border-radius: 0; /* This removes the roundness of border (value 0) */
      -moz-transition: all 1s;
      -webkit-transition: all 1s;
      -o-transition: all 1s;
      cursor:pointer;
      }

      7. Klik Preview template dan jika ok, klik Save Template

      Sunday, 15 December 2013

      Custom Redirect Blogger " Error 404 " (Page Not Found) To Homepage


      Halaman 'Error 404' akan terpapar apabila link/url sesuatu halaman tidak dijumpai pada blog anda. Jadi akan muncul halaman seperti gambar diatas yang memaparkan  " Sorry, the page you were looking for in this blog does not exist. " . Sebenarnya anda boleh custom halaman tersebut mengikut kreativiti anda. Disini saya akan tunjukkan cara untuk tambah fungsi redirect ke halaman utama blog apabila berlaku ' Error 404 ' ini.

      1. Pada Dashboard blogger anda, klik Settings > Search preferences > Custom Page Not Found (Klik Edit).

      2. Copy (CTRL+C) kod dibawah:
      Sorry, the page you're looking for in this blog does not exist.
      You will be redirected to homepage shortly.
      <script type = "text/javascript">
      BSPNF_redirect = setTimeout(function() {
      location.pathname= "/"
      }, 5000);
      </script>
      3. Paste (CTRL+V) kod diatas pada ruang " Custom Page Not Found " , 
      4. Klik Save changes dan lihat hasilnya.

      Saturday, 14 December 2013

      CSS - Efek Multi Hover Pada Imej

      hover right hover top hover left hover bottom
      Untuk Papar Efek Sila Letakkan Cursor Pada Bahagian Atas , Bawah , Kiri Atau Kanan Pada Imej

      Tutorial:

      PS: PASTIKAN ANDA BACKUP DAHULU TEMPLATE BLOG ANDA UNTUK LANGKAH KESELAMATAN . Lihat sini >> http://faiz-tutorial.blogspot.com/2013/02/tutorial-backuprestore-template.html

      1. Login ke akaun blogger anda.
      2. Klik pada Template

      3. Klik Edit HTML

      4. Klik pada ruang edit html dan tekan CTRL+F untuk paparkan ruang search

      5. Cari (CTRL + F) kod dibawah:
      </head>
      6. Copy (CTRL+C) dan Paste (CTRL+V) kod dibawah sebelum kod </head>
      <style type="text/css">
        /* The container and the image */
        div.multi-hover {
          overflow: hidden;
          position: relative;
          vertical-align: middle;
          width: 100%;
          height: 358px;
          line-height: 358px;
        }
        div.multi-hover img {width: 100%;}
      /* The texts that, by default, are hidden */
        div.multi-hover span {
          color: #FFF;
          font-size: 32px;
          font-weight: bold;
          height: 100%;
          opacity: 0;
          position: absolute;
          text-align: center;
          transition: all 0.3s linear 0s;
          width: 100%;
        }
      /* And this is what will generate the effect */
        div.multi-hover span:nth-child(1) { /* right */
          background: none repeat scroll 0 0 rgba(255, 189, 36, 0.6);
          left: 90%;
          top: 0;
        }
        div.multi-hover span:nth-child(2) { /* top */
          background: none repeat scroll 0 0 rgba(106, 170, 255, 0.6);
          left: 0;
          top: -80%;
        }
        div.multi-hover span:nth-child(3) { /* left */
          background: none repeat scroll 0 0 rgba(204, 87, 166, 0.6);
          left: -90%;
          top: 0;
        }
        div.multi-hover span:nth-child(4) { /* bottom */
          background: none repeat scroll 0 0  rgba(97, 181, 115, 0.6);
          left: 0;
          top: 80%;
        }
        div.multi-hover span:hover {opacity: 1;}
        div.multi-hover span:nth-child(2n+1):hover {left: 0;}
        div.multi-hover span:nth-child(2n):hover {top: 0;}
      </style>
          7. Klik Save Template

          8. Untuk paparkan Efek pada entri, Copy (CTRL+C) dan Paste (CTRL+V) kod dibawah pada ruang HTML entri anda ( Posts >> New Post >> HTML )
          <div class=multi-hover>
            <span>hover right</span>
            <span>hover top</span>
            <span>hover left</span>
            <span>hover bottom</span>
            <img src="https://blogger.googleusercontent.com/img/b/R29vZ2xl/AVvXsEg5lnmQXAIKbP7e-qaVIPcRhp9A7_IotShppOevZ73uR-NuYgr3dMFebrwjpnMZ8H_qM5P1gxSOtGwNienmBRnhwBMxQ0CSW-CXSl5d6pmT4Oc2Kze9ldO2d0VpOzwxC5i01CEW7La_ZaI/s640/autumn-leaves-fall-leaf-4123-hd-desktop-wallpaper.jpg" width="640" height="425" />
          </div>
          Keterangan:
          • Gantikan URL/LINK IMEJ (link yang berwarna biru) dengan URL/LINK IMEJ anda.
          • Gantikan nilai 640 dengan saiz lebar imej anda.
          • Gantikan nilai 425 dengan saiz ketinggian imej anda.

          Tutorial Meletakkan Facebook Like & Share Button Pada Setiap Entri

          Screenshot Facebook Like & Share Button
          Tutorial:

          PS: PASTIKAN ANDA BACKUP DAHULU TEMPLATE BLOG ANDA UNTUK LANGKAH KESELAMATAN . Lihat sini >> http://faiz-tutorial.blogspot.com/2013/02/tutorial-backuprestore-template.html

          1. Login ke akaun blogger anda.
          2. Klik pada Template

          3. Klik Edit HTML

          4. Klik pada ruang edit html dan tekan CTRL+F untuk paparkan ruang search

          5. Cari (CTRL + F) kod dibawah:
          <data:post.body/>
          6. Copy (CTRL+C) dan Paste (CTRL+V) kod dibawah selepas atau sebelum kod <data:post.body/>
          <!-- HTML5 CODE FACEBOOK LIKE AND SHARE BUTTON START -->
          <div id="fb-root"></div>
          <script>(function(d, s, id) {
            var js, fjs = d.getElementsByTagName(s)[0];
            if (d.getElementById(id)) return;
            js = d.createElement(s); js.id = id;
            js.src = "//connect.facebook.net/en_GB/all.js#xfbml=1";
            fjs.parentNode.insertBefore(js, fjs);
          }(document, 'script', 'facebook-jssdk'));</script>

          <div class='fb-like' data-colorscheme='light' data-font='segoe ui' data-send='true' data-show-faces='false' data-width='450' expr:data-href='data:post.url '/>
          <!-- HTML5 CODE FACEBOOK LIKE AND SHARE BUTTON END -->
          Keterangan
          • Jika anda mempunyai kod  <data:post.body/> lebih dari satu, anda boleh cuba satu persatu . Try n Error k .
            7. Klik Preview template dan jika ok, klik Save Template

            Tutorial Meletakkan Facebook Send Button Pada Setiap Entri

            Screenshot Send Button Facebook
            Facebook Send Button merupakan satu fungsi tombol yang sangat berguna untuk Ping Entri terbaru anda ke senarai Group dan Friend (Teman) facebook anda sekaligus. Jadi tak perlulah 'paste' satu persatu dalam group , leceh kan :)

            Tutorial:

            PS: PASTIKAN ANDA BACKUP DAHULU TEMPLATE BLOG ANDA UNTUK LANGKAH KESELAMATAN . Lihat sini >> http://faiz-tutorial.blogspot.com/2013/02/tutorial-backuprestore-template.html

            1. Login ke akaun blogger anda.
            2. Klik pada Template

            3. Klik Edit HTML

            4. Klik pada ruang edit html dan tekan CTRL+F untuk paparkan ruang search

            5. Cari (CTRL + F) kod dibawah:
            <data:post.body/>
            6. Copy (CTRL+C) dan Paste (CTRL+V) kod dibawah selepas atau sebelum kod <data:post.body/>
            <!-- HTML5 CODE FACEBOOK SEND BUTTON START -->
            <div id="fb-root"></div>
            <script>(function(d, s, id) {
              var js, fjs = d.getElementsByTagName(s)[0];
              if (d.getElementById(id)) return;
              js = d.createElement(s); js.id = id;
              js.src = "//connect.facebook.net/en_GB/all.js#xfbml=1";
              fjs.parentNode.insertBefore(js, fjs);
            }(document, 'script', 'facebook-jssdk'));</script>

            <div class='fb-send' data-colorscheme='light' data-font='segoe ui' data-send='true' data-show-faces='false' data-width='450' expr:data-href='data:post.url '/>
            <!-- HTML5 CODE FACEBOOK SEND BUTTON END -->
            Keterangan
            • Jika anda mempunyai kod  <data:post.body/> lebih dari satu, anda boleh cuba satu persatu . Try n Error k .
            • Jika kod diatas tidak berfungsi pada template blogger anda, padam kod diatas , gantikan dengan kod dibawah :
            <!--Facebook Send button Start --><b:if cond='data:blog.pageType != &quot;static_page&quot;'><div style='float:left;padding: 01px 05px 05px 0;'><script src='http://connect.facebook.net/en_US/all.js#xfbml=1' type='text/javascript'/><fb:send colorscheme='light' expr:href='data:post.url' font=''/></div></b:if><!--Facebook Send button End -->

            7. Klik Preview template dan jika ok, klik Save Template

            Sunday, 8 December 2013

            Tutorial Membuat Popular Post Dengan Style (V1)

            Screenshot Tutorial Membuat Popular Post Dengan Style (V1)

            Tutorial:
            PS: PASTIKAN ANDA BACKUP DAHULU TEMPLATE BLOG ANDA UNTUK LANGKAH KESELAMATAN . Lihat sini >> http://faiz-tutorial.blogspot.com/2013/02/tutorial-backuprestore-template.html

            1. Login ke akaun blogger anda.

            2. Klik butang "More Options" dan klik " Layout  ".

            3. Pada halaman Layout, klik " Add a Gadget " .

            4. Klik pada widget Popular Posts.

            5. Pada Configure Popular Posts, setting popular post , untick pada image thumbnail dan snippet . Setelah itu, klik Save.


            6. Selanjutnya , Klik pada " Template " .


            7.  Klik " Edit HTML "

            8. Klik pada ruang edit html dan tekan CTRL+F untuk paparkan ruang search

            9. Cari(Ctrl+F) kod dibawah:
             ]]></b:skin>
            10. Copy (CTRL+C) dan Paste (CTRL+V) kod dibawah sebelum kod  ]]></b:skin>
            #PopularPosts1 ul{
            list-style:none;
            counter-reset:li;
            padding:-8px 0px 1px;
            left:-8px;
            width:400px;
            }
            #PopularPosts1 li{
            position:relative;
            margin:0 0 10px 0;
            padding: 3px 2px 0 7px;
            left:-5px;
            width:250px;
            border:1px solid #ccc;
            }
            #PopularPosts1 ul li:before{
            content:counter(li);
            counter-increment:li;
            position:absolute;
            display:block;
            top:-5px;
            left:-5px;
            font-size:18px;
            width:14px;
            margin:0 0 10px 0;
            padding:4px 4px 4px 3px;
            color:#333;
            text-align:left;
            background:#E8E8E8;
            text-indent:2px;
            }
            #PopularPosts1 ul li:after{
            content:"";
            position:absolute;
            top:-5px;
            left:15px;
            width: 0px;
            height: 0px;
            border-top:5px outset transparent;
            border-left:5px solid #aeaeae;
            }
            #PopularPosts1 ul li a{
            font-size:12px; /* Font size of the links */
            color:#444; /* Color of the links */
            font-style: italic;
            margin-left:20px;
            display:block;
            min-height:25px;
            text-decoration:none;
            padding:0 4px 3px 15px;
            }
            #PopularPosts1 ul li:hover{
            background:#f9f9f9;
            border:1px solid #aaa;
            }
            #PopularPosts1 ul li a:hover{
            color:#0174DF;
            }
            11. Preview dan jika ok Klik Save Template


             SELAMAT MENCUBA :)

            Saturday, 7 December 2013

            [ANDROID] TubeMate YouTube Downloader 2.0.9

            TubeMate YouTube Downloader 2.0.9
            TubeMate YouTube Video Downloader merupakan aplikasi yang membolehkan anda dengan cepat mengakses, mencari, berkongsi, dan memuat turun video YouTube. Dengan aplikasi ini anda dapat menonton dan memuat turun video-video dengan kualiti HD (Definisi Tinggi) hanya melalui smartphone android anda.

            Ciri-ciri:
            • Mod Muat turun cepat (dengan beberapa sambungan untuk muat turun)
            • Pelbagai pilihan resolusi muat turun
            • Latar belakang, pelbagai muat turun
            • "Resume" memuat turun
            • Tukar kepada MP3 (menggunakan MP3 Media Converter)
            • Senarai main video / audio (menggunakan Meridian Player)
            • Berkongsi penemuan video anda melalui Google Buzz, Twitter atau e-mel
            • Carian dan cadangan video berkaitan YouTube
            • Simpan video kegemaran ke akaun YouTube anda, membuat senarai main
            Resolusi Tersedia:
            • 1920x1080 (Full-HD): GalaxyTab, Galaxy S2, PC
            • 1280x720 (HD): peralatan mewah
            • 640x360: peranti umum
            • 320x240: peranti rendah akhir
            • 640x360, 854x480 (FLV): Android 2.1 dan ke atas
            (pilihan yang ada bergantung kepada kualiti video yang dimuat naik dan peranti anda)

            Official Website: http://tubemate.net

            Download :